Overview: DOM, Selecting and Manipulation
- Introduction to the DOM: an API that represents and interacts with any HTML or XML document
- SELECTING BEGINS! getElementById()
(OLD)
- What? It's a Document method which returns an Element object representing the element whose id property matches the specified string.
- Why? Since element IDs are required to be unique if specified, they're a useful way to get access to a specific element quickly.
- Anything else? If you need to get access to an element which doesn't have an ID, you can use querySelector() to find the element using any selector.
- getElementsByTagName()
(OLD):
The Element.getElementsByTagName() method returns a live HTMLCollection of elements with the
given tag name.
All descendants of the specified element are searched, but not the element itself. The returned
list is live, which means it updates itself with the DOM tree automatically. Therefore, there is
no need to call Element.getElementsByTagName() with the same element and arguments repeatedly if
the DOM changes in between calls.
When called on an HTML element in an HTML document, getElementsByTagName lower-cases the
argument before searching for it. This is undesirable when trying to match camel-cased SVG
elements (such as
) in an HTML document. Instead, use Element.getElementsByTagNameNS(), which preserves the capitalization of the tag name. Element.getElementsByTagName is similar to Document.getElementsByTagName(), except that it only searches for elements that are descendants of the specified element. - getElementsByClassName(): The getElementsByClassName method of Document interface returns an array-like object of all child elements which have all of the given class name(s). When called on the document object, the complete document is searched, including the root node. You may also call getElementsByClassName() on any element; it will return only elements which are descendants of the specified root element with the given class name(s).
- querySelector(): The Document method querySelector() returns the first Element within the document that matches the specified selector, or group of selectors. If no matches are found, null is returned.
- querySelectorAll(): The Document method querySelectorAll() returns a static (not live) NodeList representing a list of the document's elements that match the specified group of selectors.
- MANIPULATION BEGINS! innerHTML: an Element property that gets or sets the HTML or XML markup contained within the element.
- textContent: a property of the Node interface: represents the text content of the node and its descendants
- innerText:
The innerText property of the HTMLElement interface represents the rendered text content of a
node and its descendants.
As a getter, it approximates the text the user would get if they highlighted the contents of the
element with the cursor and then copied it to the clipboard. As a setter this will replace the
element's children with the given value, converting any line breaks into
elements. - append():The Element.append() method inserts a set of Node objects or string objects after the last child of the Element. String objects are inserted as equivalent Text nodes. Differences from Node.appendChild(): Element.append() allows you to also append string objects, whereas Node.appendChild() only accepts Node objects. Element.append() has no return value, whereas Node.appendChild() returns the appended Node object. Element.append() can append several nodes and strings, whereas Node.appendChild() can only append one node.
- appendChild(): The appendChild() method of the Node interface adds a node to the end of the list of children of a specified parent node. If the given child is a reference to an existing node in the document, appendChild() moves it from its current position to the new position. If the given child is a DocumentFragment, the entire contents of the DocumentFragment are moved into the child list of the specified parent node. appendChild() returns the newly appended node, or if the child is a DocumentFragment, the emptied fragment.
- remove(): the Element.remove() method removes the elements from the DOM
- removeChild(): The removeChild() method of the Node interface removes a child node from the DOM and returns the removed node.
What is the DOM?
The DOM stands for Document Object Model. In the console of your webpage, type in console.dir(document) or document. It will show you how the HTML and CSS are converted into JS - there are thousands of objects!
It can best be thought of as a tree of nodes/elements created by the browser. JavaScript can be used to read/write/manipulate to the DOM. It is an OO representation.
Further Reading from the Odin ProjectgetElementById()
Inside the document objects, getElementById() is one method that allows us to select and manipulate specific properties.
Just as we can selectively apply CSS to specific elements, we can also select specific things, and target elements using JavaScript.
selecting involves target specific elements we want to be dynamic
getElementsByTagName() and getElementsByClassName()
These, and exmaples like document.getElementsByTagName('p') or document.getElementsByTagName('div') are quite easy to access and manipulate.
However, what is returned by this HTML collection? It's an Element! An Element is the most general base class from which all element objects (i.e. objects that REPRESENT elements) in a Document inherit. These ONLY have methods and properties common to all kinds of elements.
querySelector() and querySelectorAll()
querySelector() is a newer, all-in-one method to select a single element:
                        //FIND THE FIRST h1 Element
                        document.querySelector('h1');

                        //FIND THE FIRST Element with the 'red' id
                        document.querySelector('#red');

                        //FIND THE FIRST Element with class 'big'
                        document.querySelector('.big');
Notice how, unlike with selectElementById (and their brethren), we use .big and #red in these calls!
As you can imagine, the querySelectorAll() call will grab ALL of the associated elements. We returning a COLLECTION of those matching elements
However, some review of CSS is important. We can use document.querySelectorAll('p a') to create new calls (remember the DESCENDANTS!)
                            //FIND ALL a elements that are DESCENDANTS of p elements
                            document.querySelectorAll('p a');
innerHTML, textContent, and innerText
The previous document methods simply involved SELECTING! This is about MANIPULATION!
If we took an example where we grab the <p> element using document.querySelector('p'), we can choose to look at the innerHTML, innerText, and textContent.
As an example, you could choose to create a prank where the word 'REDACTED' appears in place of every link on the CIA Wikipedia page - for whatever reason. The .innerText method is perfect for that!
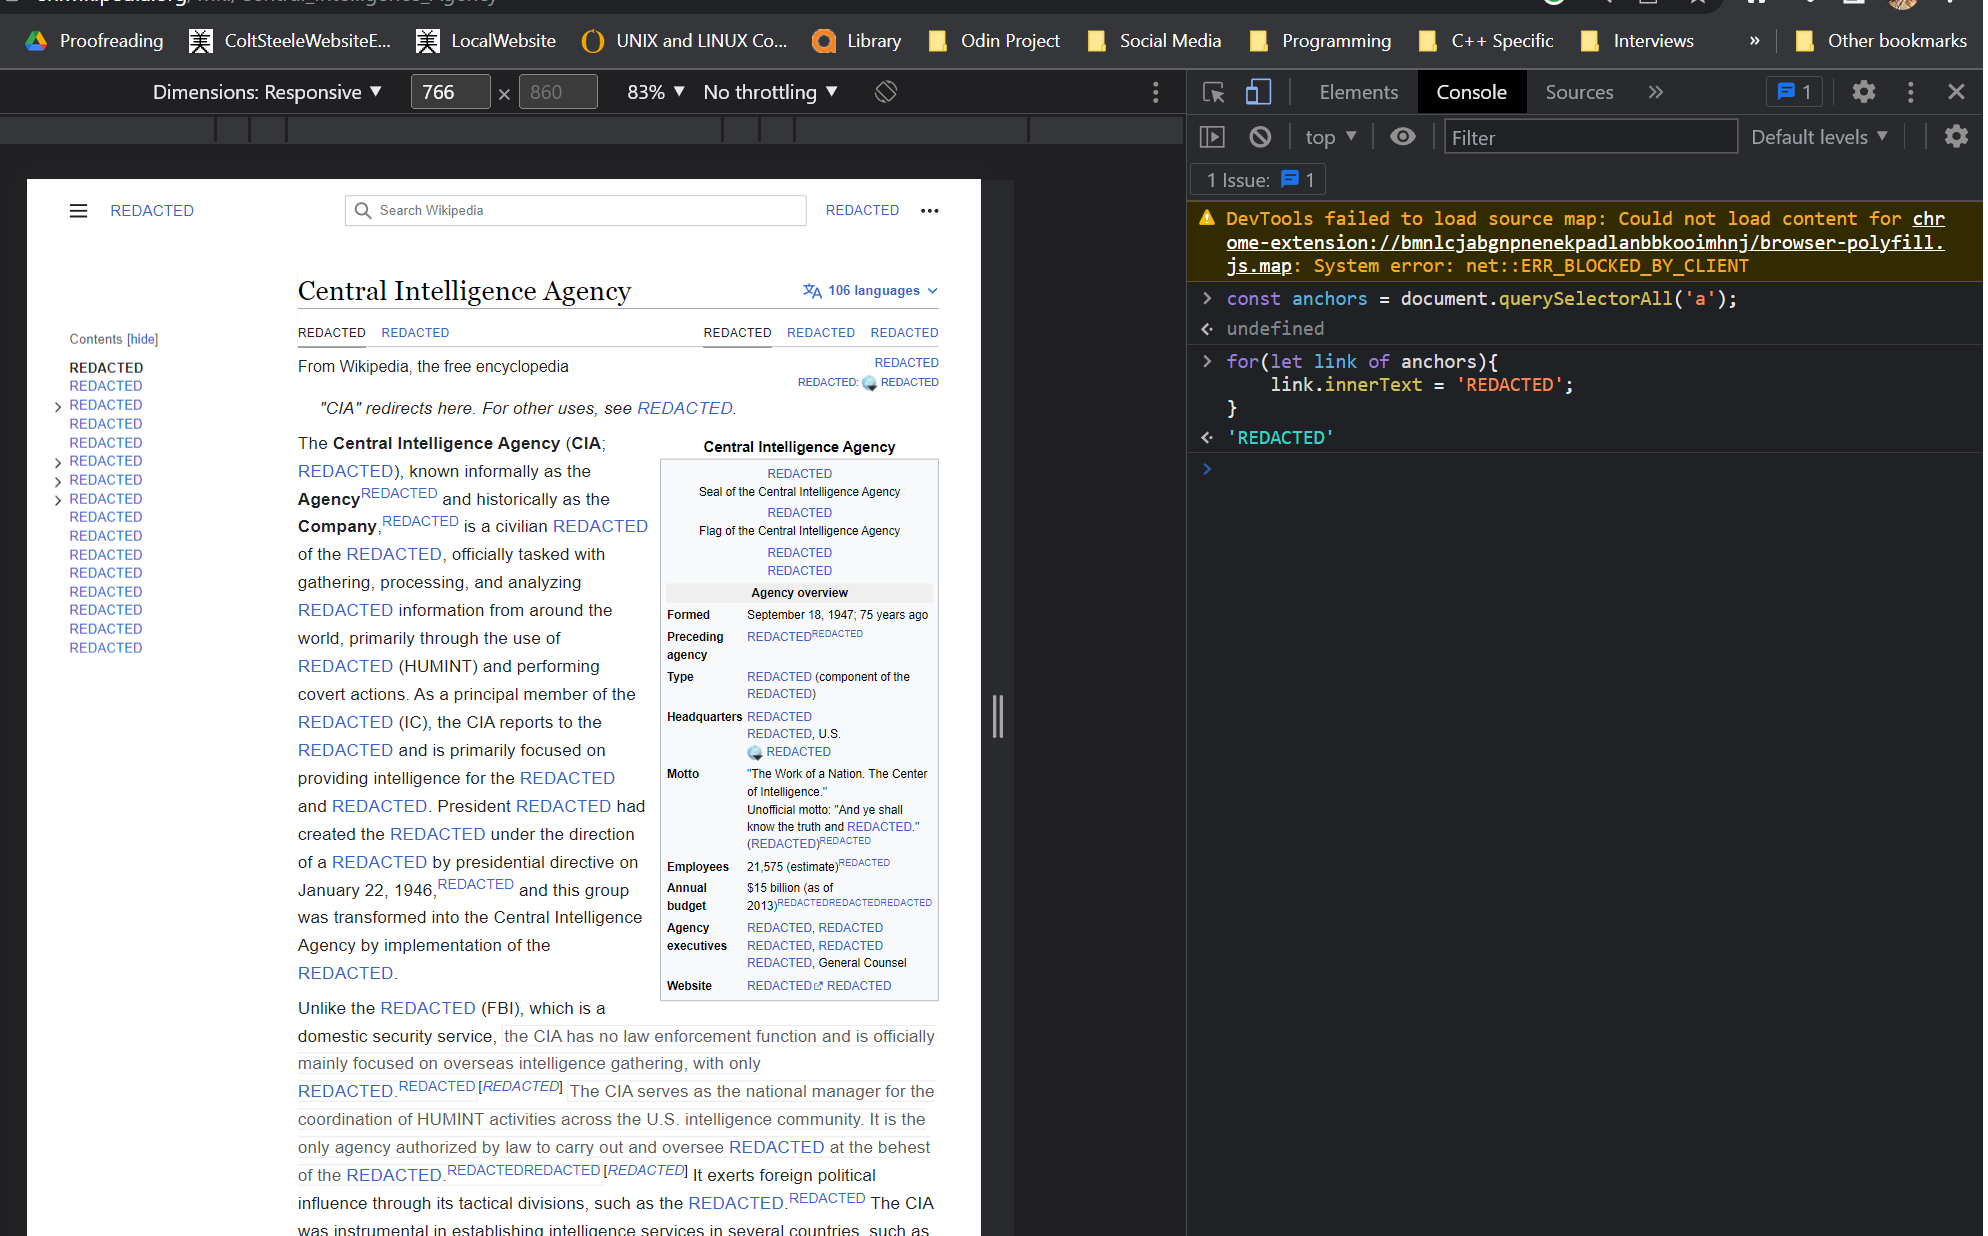
                        const anchors = document.querySelectorAll('a');
                        for(let anc of anchors)
                            anc.innerText = 'REDACTED';
To mess around with the HTML of the element, we can use the .innerHTML tag:
                        for(let link of anchors){
                            link.innerHTML = ('REDACTED');
                        }
                        'REDACTED'
Don't forget, if we're changing this inside the JS file, we're going to have some significant dynamism made possible :)
Manipulating Attributes using getAttribute() and setAttribute()
getAttribute() is a method of the Element interface. It returns the value of a specified attribute on the element.
Unlike querySelector, the getAttribute method will take the value directly from the HTML itself. Accessing an attribute using object.href (see example) will grab the value from a JavaScript object, which can give us a different value.
setAttribute(name,value) is a method that sets the value of an attribute on a specified element. It can update an existing value of an element, OR add a new attribute with the specified name and value.
                            const firstLink = document.querySelector('a');

                            //This will return the value from the JS object!
                           firstLink.href;

                            //This is getting the value DIRECTLY from the HTML itself!
                            firstLink.getAttribute('href');

                            //If NO such attribute has been set, null is returned
                            firstLink.getAttribute('nonce-sense');

                            //This sets the website link back to a city I'd love to return to :)
                            firstLink.setAttribute('href', 'https://discover-fujisawa.jp/')
Styles in the DOM
Quite a lot of work is needed to do this, so it isn't always recommended! The changing of style of specific elements by JavaScript is possible. First, we need a line, such as const example = document.querySelectorAll('a'); to get all anchor tags.
Once we have that, notice how (as long as NO INLINE styling is present on the elements), each element within the .style of your chosen object is empty!
Using camelCase (i.e. background-color backgroundColor, we
can style our elements using JavaScript!
For example, example.style.backgroundColor = 'red' or example.style.textDecoration = 'wavy' or example.style.fontSize = '3em';
One special way we can check out the style after the browser has processed it is to use a special method called getComputedStyle(example);
We can access specific properties using window.getComputedStyle(h1).fontSize; If there's a property that exists for it, we'll be able to find it!
It's also possible manipulate these things: although the methods to do so are a little involved. For example, to change the fontSize from 32px to 64px, you might need to parseInt the integer 32, then double it (or somehow change it to 64), and then add px when you convert it back into a string.
Using classList
We can use classList, which allows us to access and manipulate an element's list of classes.
.add()
Using example.classList.add('classNameHere'), it's possible to add classes onto what attribute or property we have selected.
Another popular usage is .remove(), which...well, allows us to remove specific classes!
One more (less common) is .contains('eg'), which simply returns true/false
Extremely useful is the ability to TOGGLE! .toggle() allows us to switch a class on or off! When we click on the accordion (drop-down) on a Google list, .toggle() is highly likely to be the piece of underlying JavaScript that allows the answer to the question to display.
parentElement and using children to get a child element
Knowing how to traverse/access a parent element can come in very handy! To do so, we need to be able to use something like:
                            const firstBold = document.querySelector('b');

                            //This will give us what the parentElement of b is
                            firstBold.parentElement;
                            //It could be li, p, etc...

                            //We can go deeper!
                            firstBold.parentElement.parentElement
Using .children on an element brings up a list of child elements. It will bring up a list of all child elements (not an array), which can be accessed or manipulated.
Keeping it in the family with nextSibling, nextElementSibling, previousSibling, and previousElementSibling
We can navigate through siblings of elements.
However, nextSibling and previousSibling refer to the node.
We can easily navigate to 'same level' siblings using .nextElementSibling and .previousElementSibling
Creating new elements from scratch with createElement and appendChild()
This should be fairly intuitive too! Let's look at a way to create an image.
                            //Gives us a new element <img>
                            const newImage = document.createElement('img');

                            //Adding a random source
                            newImage.src = 'https://unsplash.com/photos/oFi1nkOSXY0'
We have created the new image, but now need to try and include it somewhere in our document! We can use something like document.body.appendChild(newImage);, which will append this as the last child of the <body> part of the HTML.
Another example:
                            //Gives us a new element <h3>
                            const newH3 = document.createElement('h3');

                            //This modifies the text of the new element.
                            newH3.innerText = 'Revenge!'

                            //Note the lack of ' '
                            document.body.appendChild(newH3)
Adding things simply using append or prepend
A newer method that is a somewhat easier way to append something into a document.
For example, let's say we want to add 'And that's the end of the first chapter' to the opening paragraph:
                            //Finds the first paragraph
                            const p = document.querySelector('p');

                            //Adds in the redundant final line :)
                            p.append('And that is the end of the first chapter');
To make this even more Simpson-esque - do it to ALL p elements!
                        //Finds all paragraphs
                        const p = document.querySelectorAll('p');

                        //Adds in our reference :)
                        p.append('And that is the end of that chapter');
NB: it's possible to append MULTIPLE at the same time: p.append('Do not touch', 'Willie.');
A similar thing is prepend, which can be used (Red Dwarf reference) biblically:
                            //Finds the first paragraph
                            const p = document.querySelector('p');

                            //Adds in a Red Dwarf reference:)
                            p.append('To my darling Candy.
                            All characters portrayed within
                            this book are fictitious
                            and any resemblance to persons
                            living or dead is purely coincidental.');
insertAdjacentElement
Let's say we want something to go BETWEEN two elements, such as a new h2 between the <h1> and <p>. That's where insertAdjacentElement() can come in!
First, create your h2! const h2 = document.createElement('h2');
Next, use some way of adding text, like append or innerText: h2.append('Revenge is futile...');
We can use the syntax targetElement.insertAdjacentElement(position,element); to help us! The position can be beforebegin (before the target element), afterbegin (inside the target element, before the first child), beforeend (just inside the targetElement, after its last child), or afterend (after the targetElement itself). Read the documentation!
I used: h1.insertAdjacentElement('afterend',h2), which will squeeze it in after h1. It's inserted as a sibling!
removeChild() and remove
removeChild() is a method we call on the parent of the element we want to remove!
For example, it is possible to remove the first <li> element from the document like so:
                            //Finds the first paragraph
                            const firstLi = document.querySelector('li');

                            const par = firstLi.parentElement();
                            par.removeChild(firstLi);
                            //The above line is KEY to the removal!
A newer method that is more popular is remove. This isn't good if IE support is required, but is much more convenient to use:
                            //Finds the first paragraph
                            const firstLi = document.querySelector('li');

                            firstLi.remove();